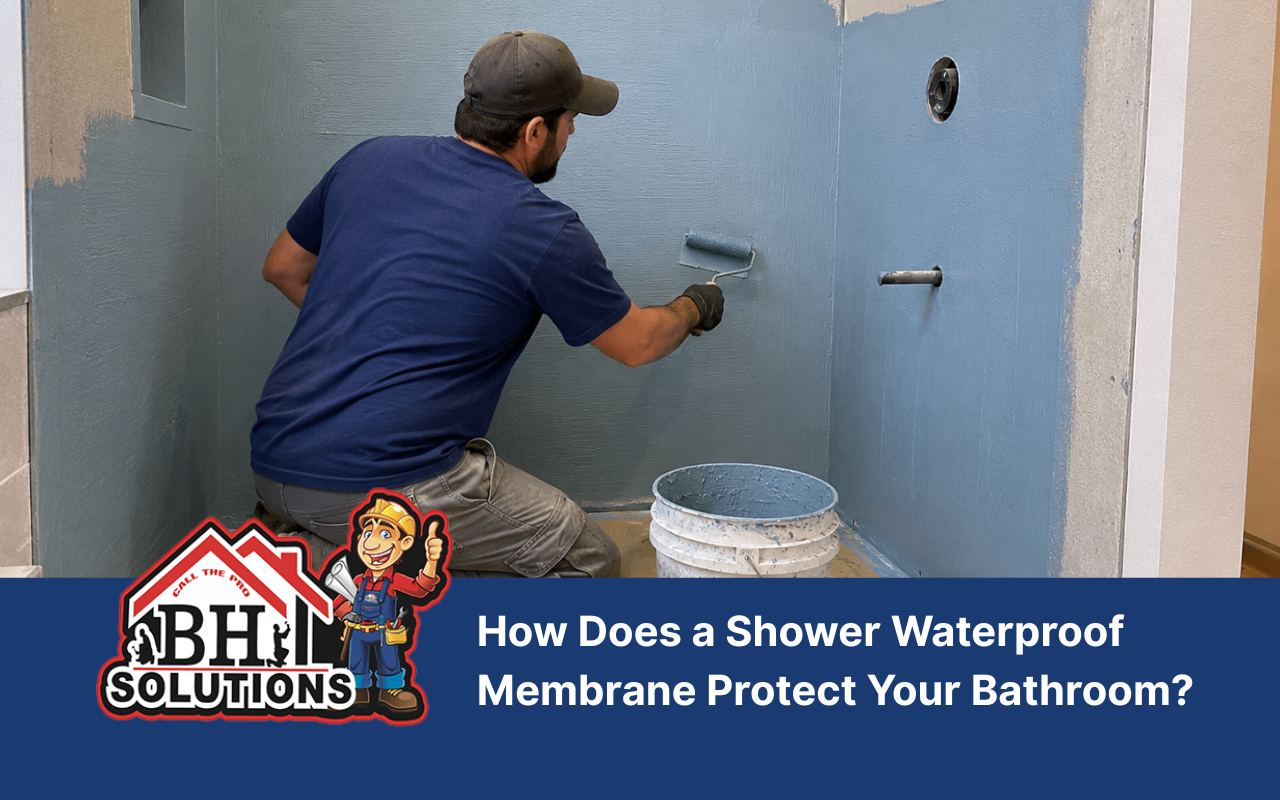
A shower waterproof membrane creates a sealed layer behind the finished tile. Therefore, water cannot easily reach the walls, framing, or subfloor. This hidden protection is essential because tile and grout are not fully waterproof.
Even small openings can allow moisture into the shower substrate. Over time, that moisture may cause stains, soft materials, odors, or loose tiles. However, a complete shower waterproof system helps block those problems before they begin.
At BH Solutions, LLC, we treat waterproofing as a complete process. We protect walls, floors, corners, joints, drains, and fixture openings. Consequently, each connected area supports reliable shower leak prevention.
Choose the Right Membrane for Lasting Water Defense
Several membrane types can create a strong bathroom moisture barrier. However, each product has different preparation and application needs. Therefore, the right choice depends on the surface, shower design, and installer’s experience.
- Liquid membranes: These products roll or brush onto the prepared surface. Moreover, they fit curves, niches, and unusual shapes.
- Sheet membranes: These flexible sheets create an even protective layer. However, seams and overlaps require careful sealing.
- Foam waterproof boards: These panels combine a stable base with built-in water protection. Therefore, they can simplify some installations.
A suitable tile membrane must work with the chosen mortar and surface. In addition, every sealant, tape, and drain part should belong to a compatible system. Mixing unrelated products may create weak connections.
At BH Solutions, LLC, we review the full shower area before selecting materials. As a result, the chosen waterproof installation supports the tile layout and expected daily use.
Prepare Every Surface to Build a Reliable Barrier
Good waterproofing begins with a clean and stable base. Therefore, remove dust, grease, loose material, and old adhesive before applying any membrane. Even a small amount of dirt can weaken the bond.
Next, inspect the shower substrate for cracks, gaps, movement, and uneven areas. Repair damaged sections before continuing. Otherwise, the membrane may stretch, peel, or separate after the tile is installed.
- Confirm that wall boards are firmly attached.
- Fill approved gaps with compatible repair materials.
- Level high and low areas where needed.
- Clean corners, drains, niches, and fixture openings.
- Apply primer when the product instructions require it.
Furthermore, the shower floor must slope toward the drain. A common target is about one-quarter inch per foot. This slope guides water away and reduces standing moisture.
When planning a larger update, our eco-friendly bathroom remodel tips can also support practical material choices. Therefore, you can consider durability and responsible design together.
Apply Wall Protection Carefully for Complete Shower Coverage
Waterproof shower walls need full and even coverage. First, measure the area and plan where seams will fall. Then, protect corners, niches, valves, and pipe openings before covering the larger surfaces.
- Apply approved corner tape or formed corner pieces.
- Seal all board joints with the required system materials.
- Spread liquid membrane evenly or place sheet sections carefully.
- Remove bubbles, wrinkles, and uncovered spots immediately.
- Add the required second coat or approved seam overlap.
- Allow the material to dry for the stated period.
For liquid products, coat thickness matters. A layer that looks covered may still be too thin. Therefore, follow the manufacturer’s coverage instructions instead of judging only by color.
For sheet products, press the material firmly into the bonding layer. Moreover, smooth each section from the center toward the edges. This method helps remove trapped air.
At BH Solutions, LLC, we also check every plumbing opening before moving forward. Consequently, small gaps do not remain hidden behind trim plates.
Seal Floor Areas to Stop Hidden Water Damage
The waterproof shower floor carries water toward the drain every day. Therefore, its slope, seams, and drain connection require special attention. One weak detail can affect the entire shower waterproof system.
Begin with a clean, solid, and correctly sloped base. Next, install the drain connection required by the selected membrane. The waterproof layer must join the drain without gaps or loose edges.
Then, carry the floor protection up the walls. This overlap creates a continuous basin around the shower. Moreover, wall and floor materials should connect without exposed seams.
- Cover the complete floor without pinholes.
- Seal the drain according to the system instructions.
- Protect every inside and outside corner.
- Check the curb and doorway transitions carefully.
- Keep the finished surface smooth for tile installation.
At BH Solutions, LLC, we consider the curb part of the wet area. Therefore, its top, sides, corners, and connections receive continuous protection.
Reinforce Corners and Joints Against Common Leak Paths
Corners and joints often experience slight movement. Therefore, these areas need flexible reinforcement within the bathroom moisture barrier. A simple surface coating may not protect a moving gap.
Use approved sealing tape, corner pieces, collars, and flashing materials. Then, embed each piece fully into the required bonding coat. Avoid folds because they can create raised areas beneath the tile.
Additionally, inspect seams where different surfaces meet. This includes walls, floors, curbs, benches, niches, and thresholds. Each transition should form part of one connected waterproof installation.
Fixture openings also need attention. Consequently, use suitable collars or sealants around shower arms, valves, and other penetrations. Decorative covers alone cannot stop water behind the wall.
For homeowners considering selected updates themselves, our DIY shower remodel guide explains important planning points. However, professional support is wise when hidden damage or complex plumbing is present.
Test the Finished Barrier Before Installing Any Tile
A flood test can reveal problems before tile covers the membrane. Therefore, complete the test only after every material has fully cured. Follow the membrane and drain instructions throughout the process.
First, plug the drain with a proper test plug. Then, fill the shower base to the approved level. Mark the water line and leave the water undisturbed for the required period.
Afterward, compare the water level and inspect nearby areas. Look below the shower when access is available. Also, check walls, ceilings, and adjoining rooms for moisture.
If the level drops, do not install tile yet. Instead, drain the base and locate the weak area. Repair it with compatible products, allow full curing, and repeat the test.
At BH Solutions, LLC, we view testing as an essential quality check. As a result, the finished tile does not hide an unconfirmed barrier.
Maintain Dry Conditions for Longer Bathroom Performance
A membrane provides hidden protection, but regular care still matters. Therefore, keep visible surfaces clean and repair damaged seals promptly. Good ventilation also reduces moisture after each shower.
Run the exhaust fan during bathing and afterward. In addition, leave the door open when practical. These habits help walls, grout, and fixtures dry faster.
- Inspect caulked joints every few months.
- Repair cracked grout or loose sealant promptly.
- Clean surfaces with mild, suitable products.
- Avoid tools that scratch tile or joint materials.
- Watch for odors, stains, or loose tiles.
Furthermore, never ignore repeated damp areas outside the shower. They may signal a plumbing issue, failed seal, or damaged waterproof layer. Early action can prevent wider repairs.
With BH Solutions, LLC, you receive clear guidance before remodeling work begins. For help reviewing your bathroom, contact our remodeling team and describe the concern you have noticed.
Frequently Asked Questions
Does tile alone keep shower walls waterproof?
No. Tile and grout can allow small amounts of moisture through. Therefore, a sealed layer should protect the surface underneath. Our DIY shower remodel guide explains why preparation must happen before the finishing materials are installed.
Can one membrane protect both walls and floors?
Some systems can cover both areas. However, the product must match the drain, base, seams, and surface materials. For project-specific guidance, get in touch with us before selecting products.
How long should waterproofing dry before tiling?
Drying time depends on the selected product, thickness, humidity, and room temperature. Therefore, always follow the manufacturer’s instructions. Our DIY shower remodel guide also highlights the importance of allowing materials to dry fully.
Should a waterproofed shower receive a flood test?
Yes, when the system and local requirements allow it. A flood test can expose weak areas before tile installation. To discuss proper testing for your project, reach out our remodeling team.
Can sustainable materials work in a waterproof bathroom?
Yes. Durable, water-conscious, and lower-waste choices can support a practical bathroom plan. However, all materials must suit wet locations. Explore our eco-friendly bathroom remodel tips for related ideas.
References:
- How To Use a Membrane System to Waterproof Your Shower — This Old House
- Best Cement Boards for the Shower — The Spruce